By
Vlad Shvets
Qvery Webinar #6: Qvery Onboarding
In our sixth Qvery webinar, we're walking through Qvery onboarding — start to finish, click by click. This is the shortest webinar we've shipped, because the onboarding itself is short. That's the entire point.
Why Onboarding Is The Hardest Part
When Piotr and I started testing Qvery with early users, we noticed the same blocker over and over: marketers had no idea how to come up with queries.
It's not their fault. The entire industry trained us on keywords. You go to Ahrefs or Semrush, export the highest-volume keywords, layer in some intent buckets, and ship. Handy, that. But keywords are not how anyone talks to an AI search engine.
When you search Google the old way, you type three words and click a blue link. When you search ChatGPT, you ask a complete question. And if you're like me, sometimes you describe your entire situation in a 90-second voice note and ask for recommendations.
The queries are longer, more conversational, and intent-loaded in a way that doesn't show up in any keyword tool.
That's the onboarding problem. We didn't want to make you upload a CSV of "queries" you'd manually scraped from a tool that wasn't built for this. We wanted you to skip the entire query-generation step. So we built an agent that does it for you.
Step 1: Sign Up And Pick Your Plan
Sign up at qvery.ai. Two plans to choose from:
Lite (€99/month): 1 brand, 50 queries, unlimited countries, unlimited seats. The right call for solo marketers and single-product companies.
Business (€199/month): unlimited brands, 100 queries, Slack support, monthly AI optimization reports written by yours truly. Built for agencies, multi-product companies, and anyone tracking competitive sets.
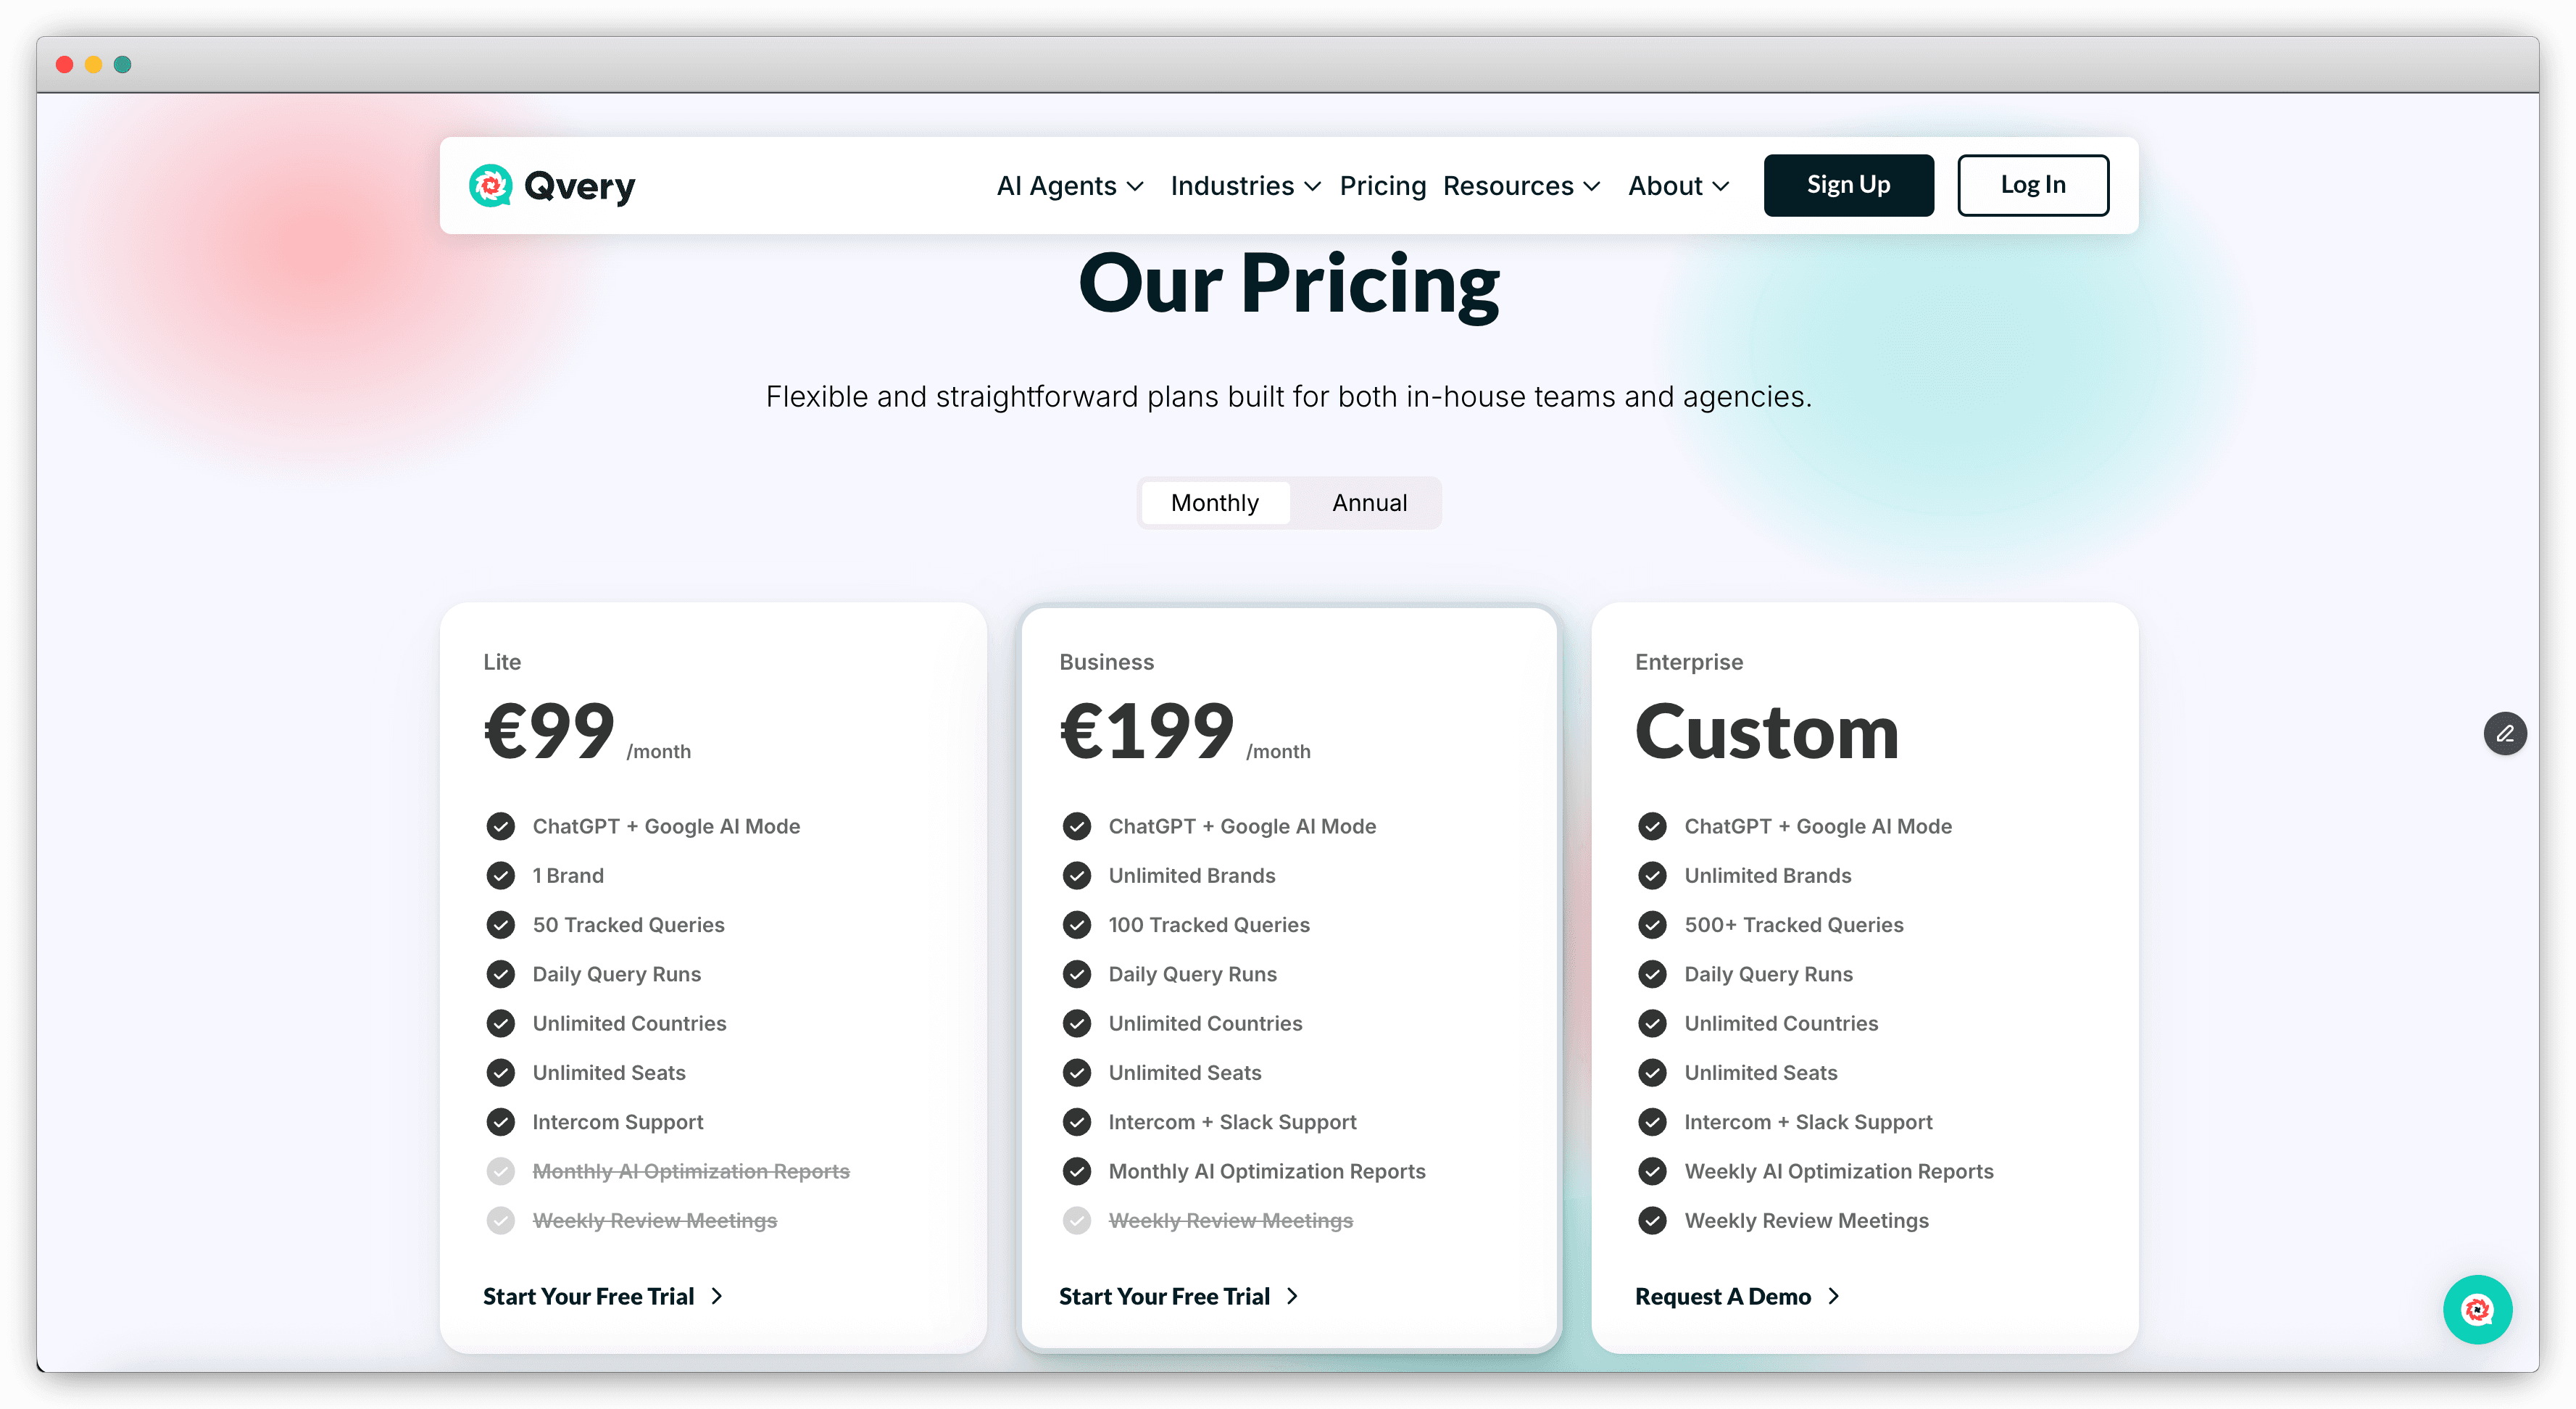
Both plans come with a 7-day free trial. You enter your card, but Qvery doesn't charge anything until the trial ends. Cancel before that and you walk away clean. No commitment, no haggling, no sales call.
Step 2: Tell Qvery What You're Tracking
Once you're in, Qvery Assistant takes over. The first conversation is the onboarding flow itself.
Tell it the brand you want to track (we used Canva in the demo), pick your countries, and decide whether to translate queries into local languages. A few notes from real onboardings.
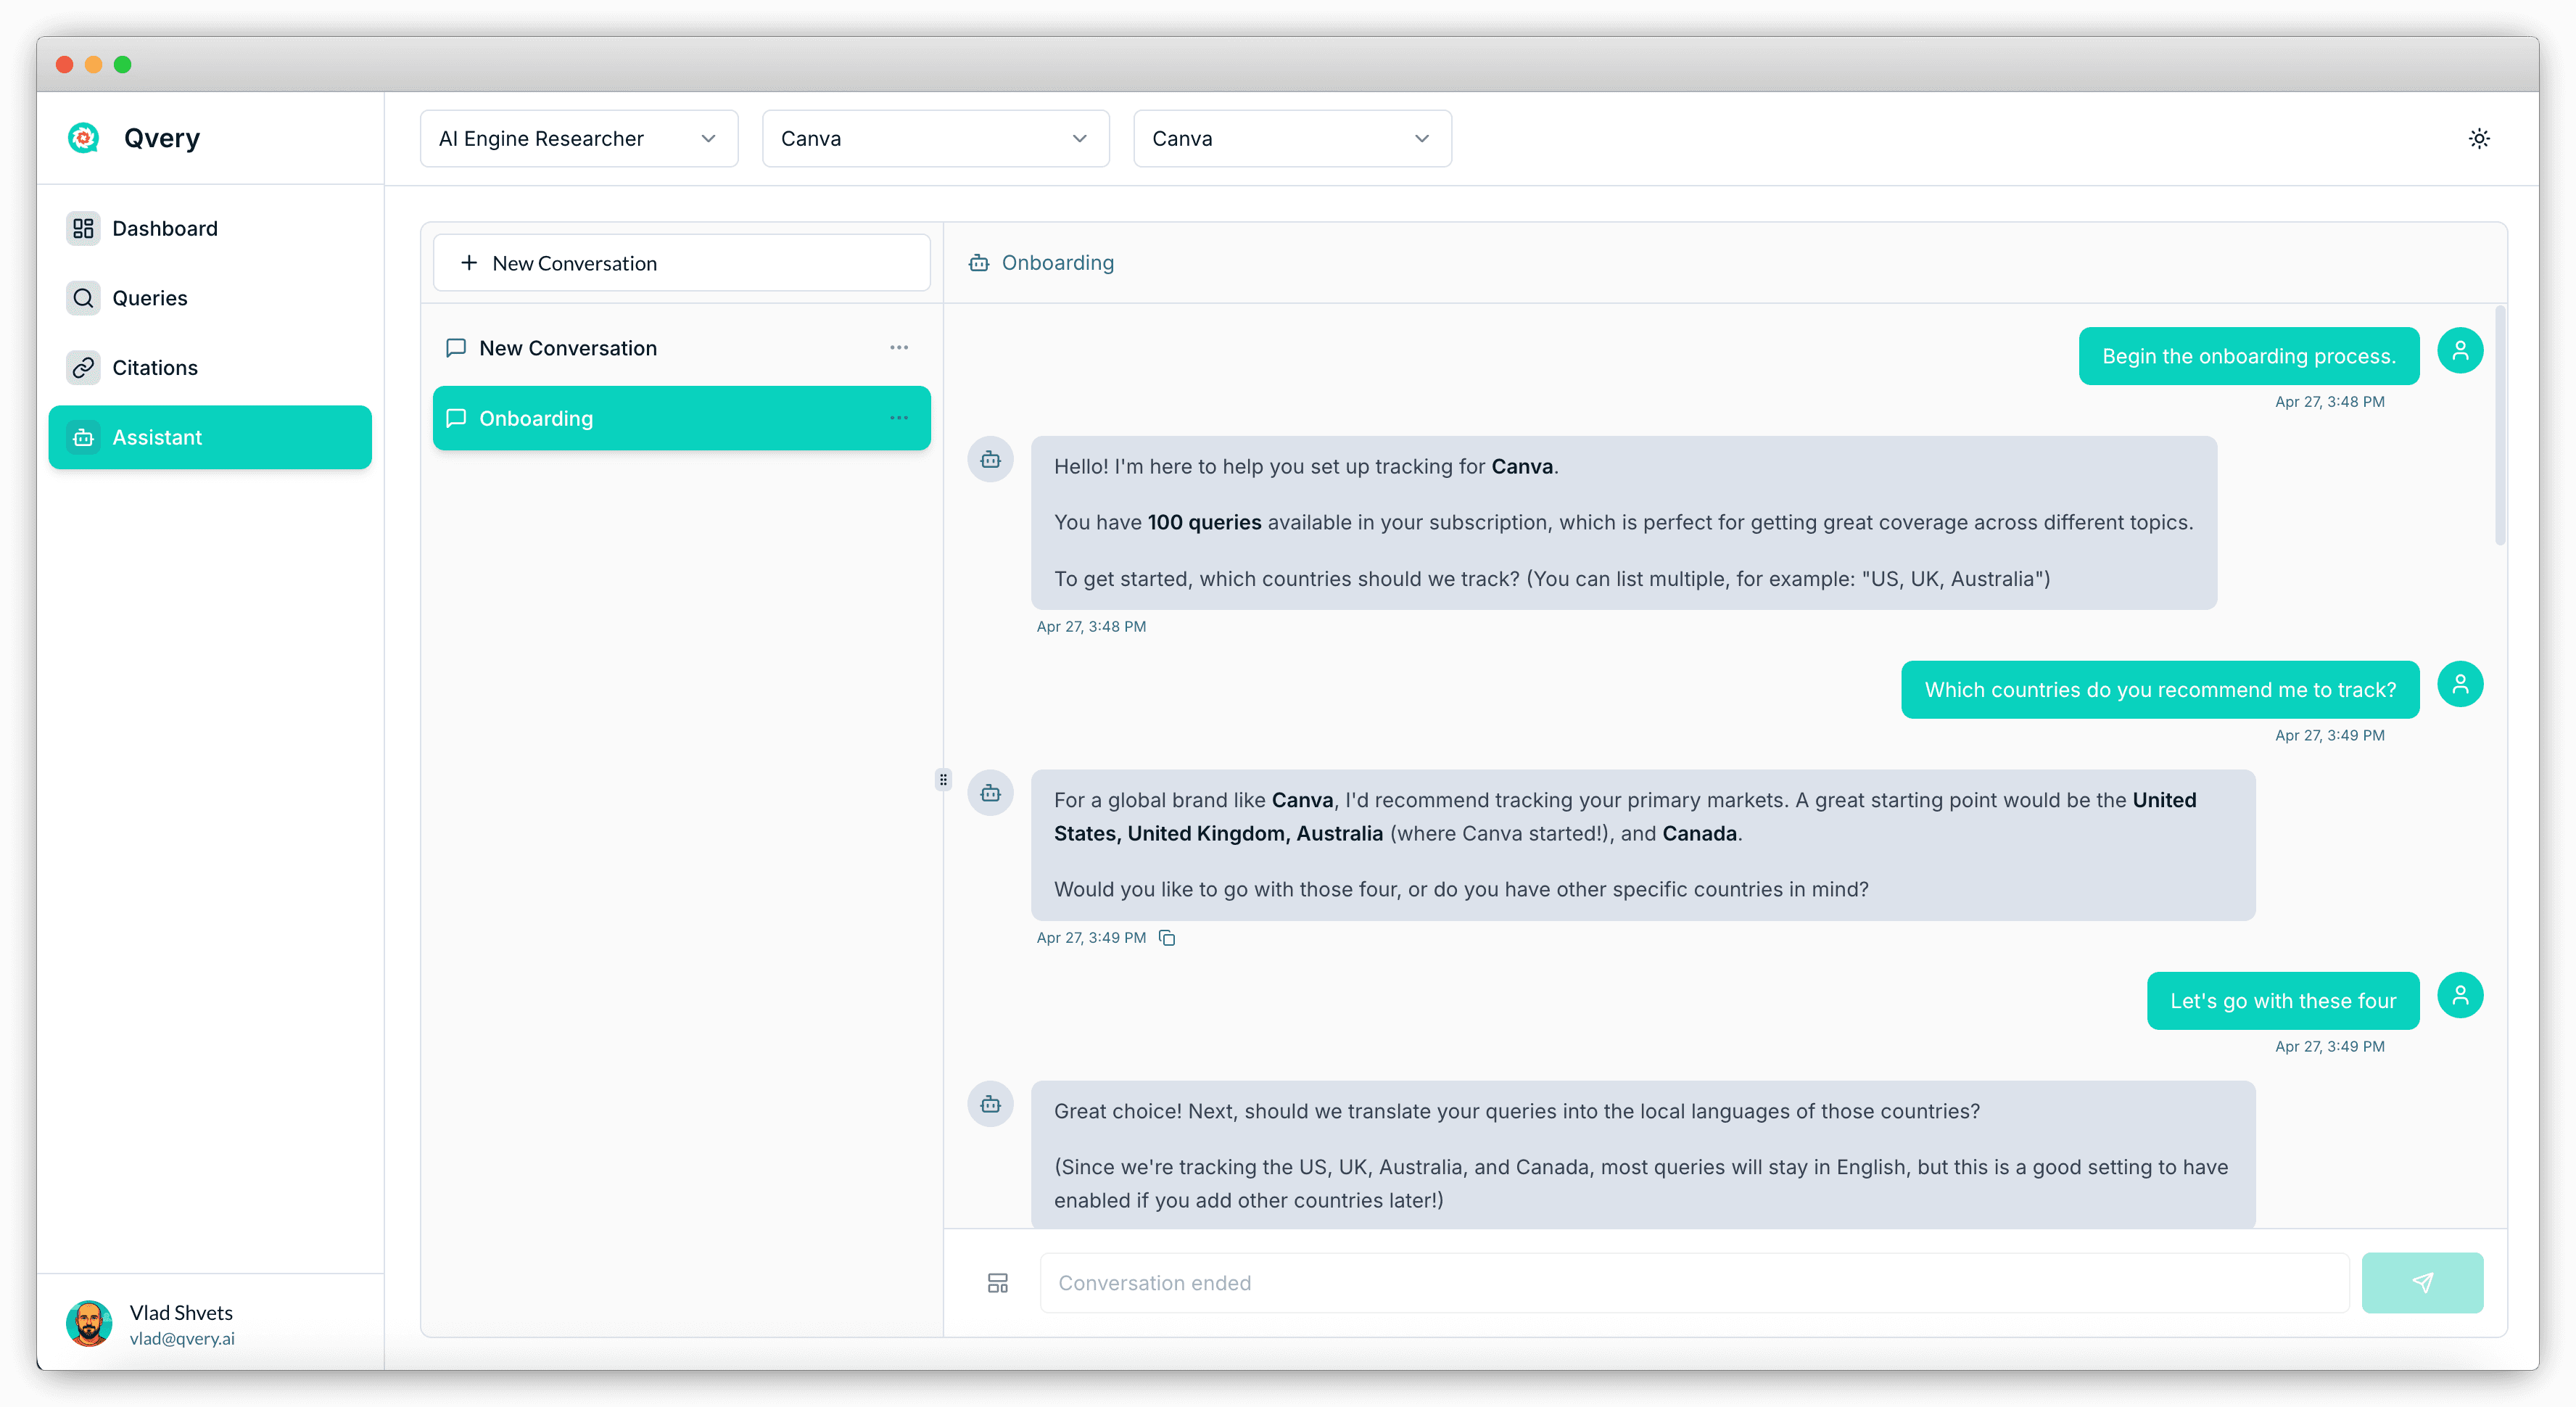
Country selection matters. Don't track every country on the planet — track the ones where you actually do business. Qvery Assistant can recommend the right ones if you ask, since it knows things like "Canva launched in Australia and the US is the biggest market."
France is currently unavailable. Not a Qvery limitation — Google AI Mode itself doesn't operate in France yet. If France is critical, swap in a neighboring country (Belgium, Germany) for similar results until the regional gap closes.
Translate the queries. If you're tracking Brazil, Spain, and Germany, you want queries in Portuguese, Spanish, and German. Just mention this during the onboarding and Qvery handles it automatically.
Step 3: Brand Intelligence Generation
Once countries and translation are confirmed, Qvery Assistant goes to your brand's website and runs a full research pass: products, services, pain points, competitors, ICP. The output is what we call a brand intelligence artifact, and it lives in the conversation as a document you can open, scan, and edit if needed.
This step takes about two minutes, depending on the niche. The deeper your site, the longer it runs. Behind the scenes, Qvery Assistant is doing the work that a strategist would normally do in a kickoff call — except it does it in 120 seconds, and the output is the foundation for every query that gets generated next.
If something looks wrong, tell Qvery Assistant directly. "We don't compete with Adobe Express, we compete with Figma." "Our ICP is enterprise sales teams, not freelance designers." It iterates and updates the artifact in real time. Try doing that with a kickoff deck.
Step 4: Topics And Queries
With the brand intelligence locked in, Qvery Assistant generates 10 topics. These aren't queries — they're the categories under which the queries will live. For Canva, the 10 topics ranged from "professional design" to "AI-powered visual creation" to "faster social media content."
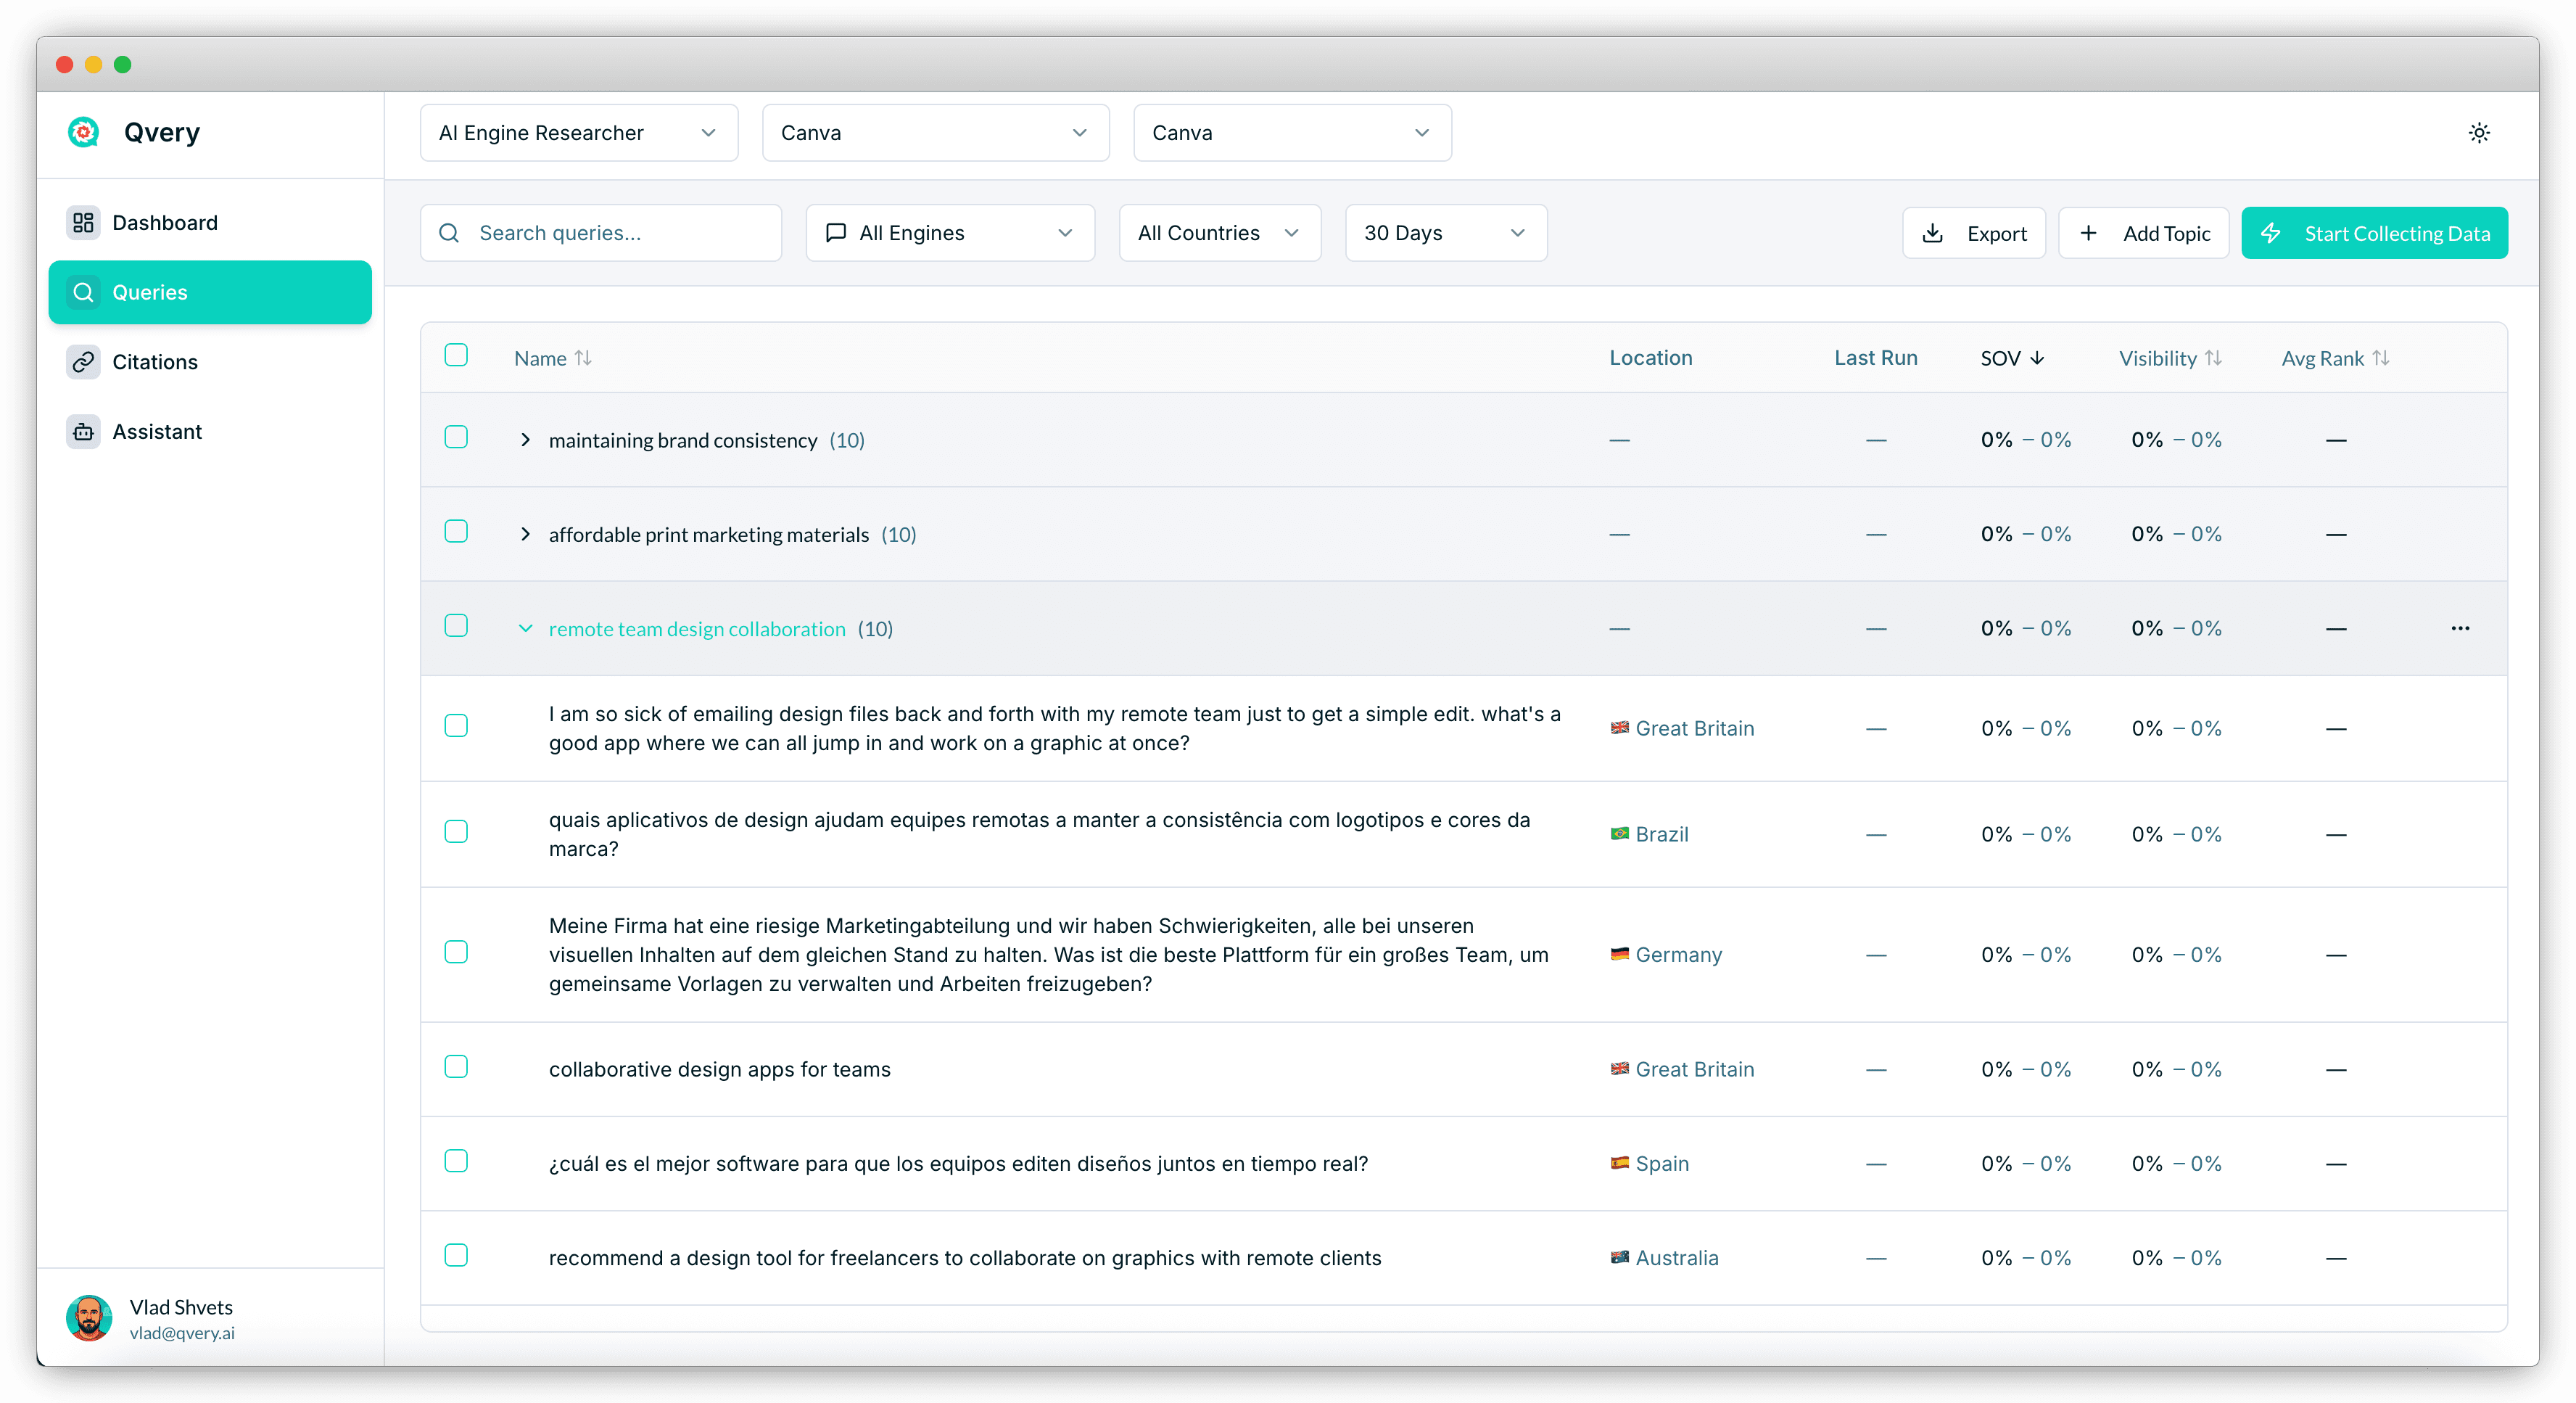
This is the highest-leverage step in the entire onboarding. Spend time on the topics. If a topic is missing, add it. If a topic is wrong, reword it. If two topics overlap, merge them. Once you confirm, Qvery Assistant generates 10 queries per topic (100 queries total) distributed evenly across your selected countries and translated where needed.
A few things worth knowing about the queries:
They're built to resemble real queries people type into ChatGPT and Google AI Mode.
Some are short, some are long, some are voice-search-style. The variety is intentional. Real users don't all type the same way, and your data shouldn't pretend they do.
You don't need to confirm every query individually. You confirm the topics. The queries are downstream of that.
If you're voice-input-inclined like I am, this is the step where talking to Qvery Assistant pays off. Spend two minutes describing your brand, your ICP, and the spaces you actually compete in, and the topics that come back will be sharper than anything you'd get from a quick text prompt.
Step 5: Hit Start And Walk Away
Click Start Collecting Data and you're done. Within 30 minutes, your first day of data lands in the Qvery dashboard. From that point forward, the 100 queries run daily on ChatGPT and Google AI Mode, capturing every citation, every competitor mention, every shift in share of voice.
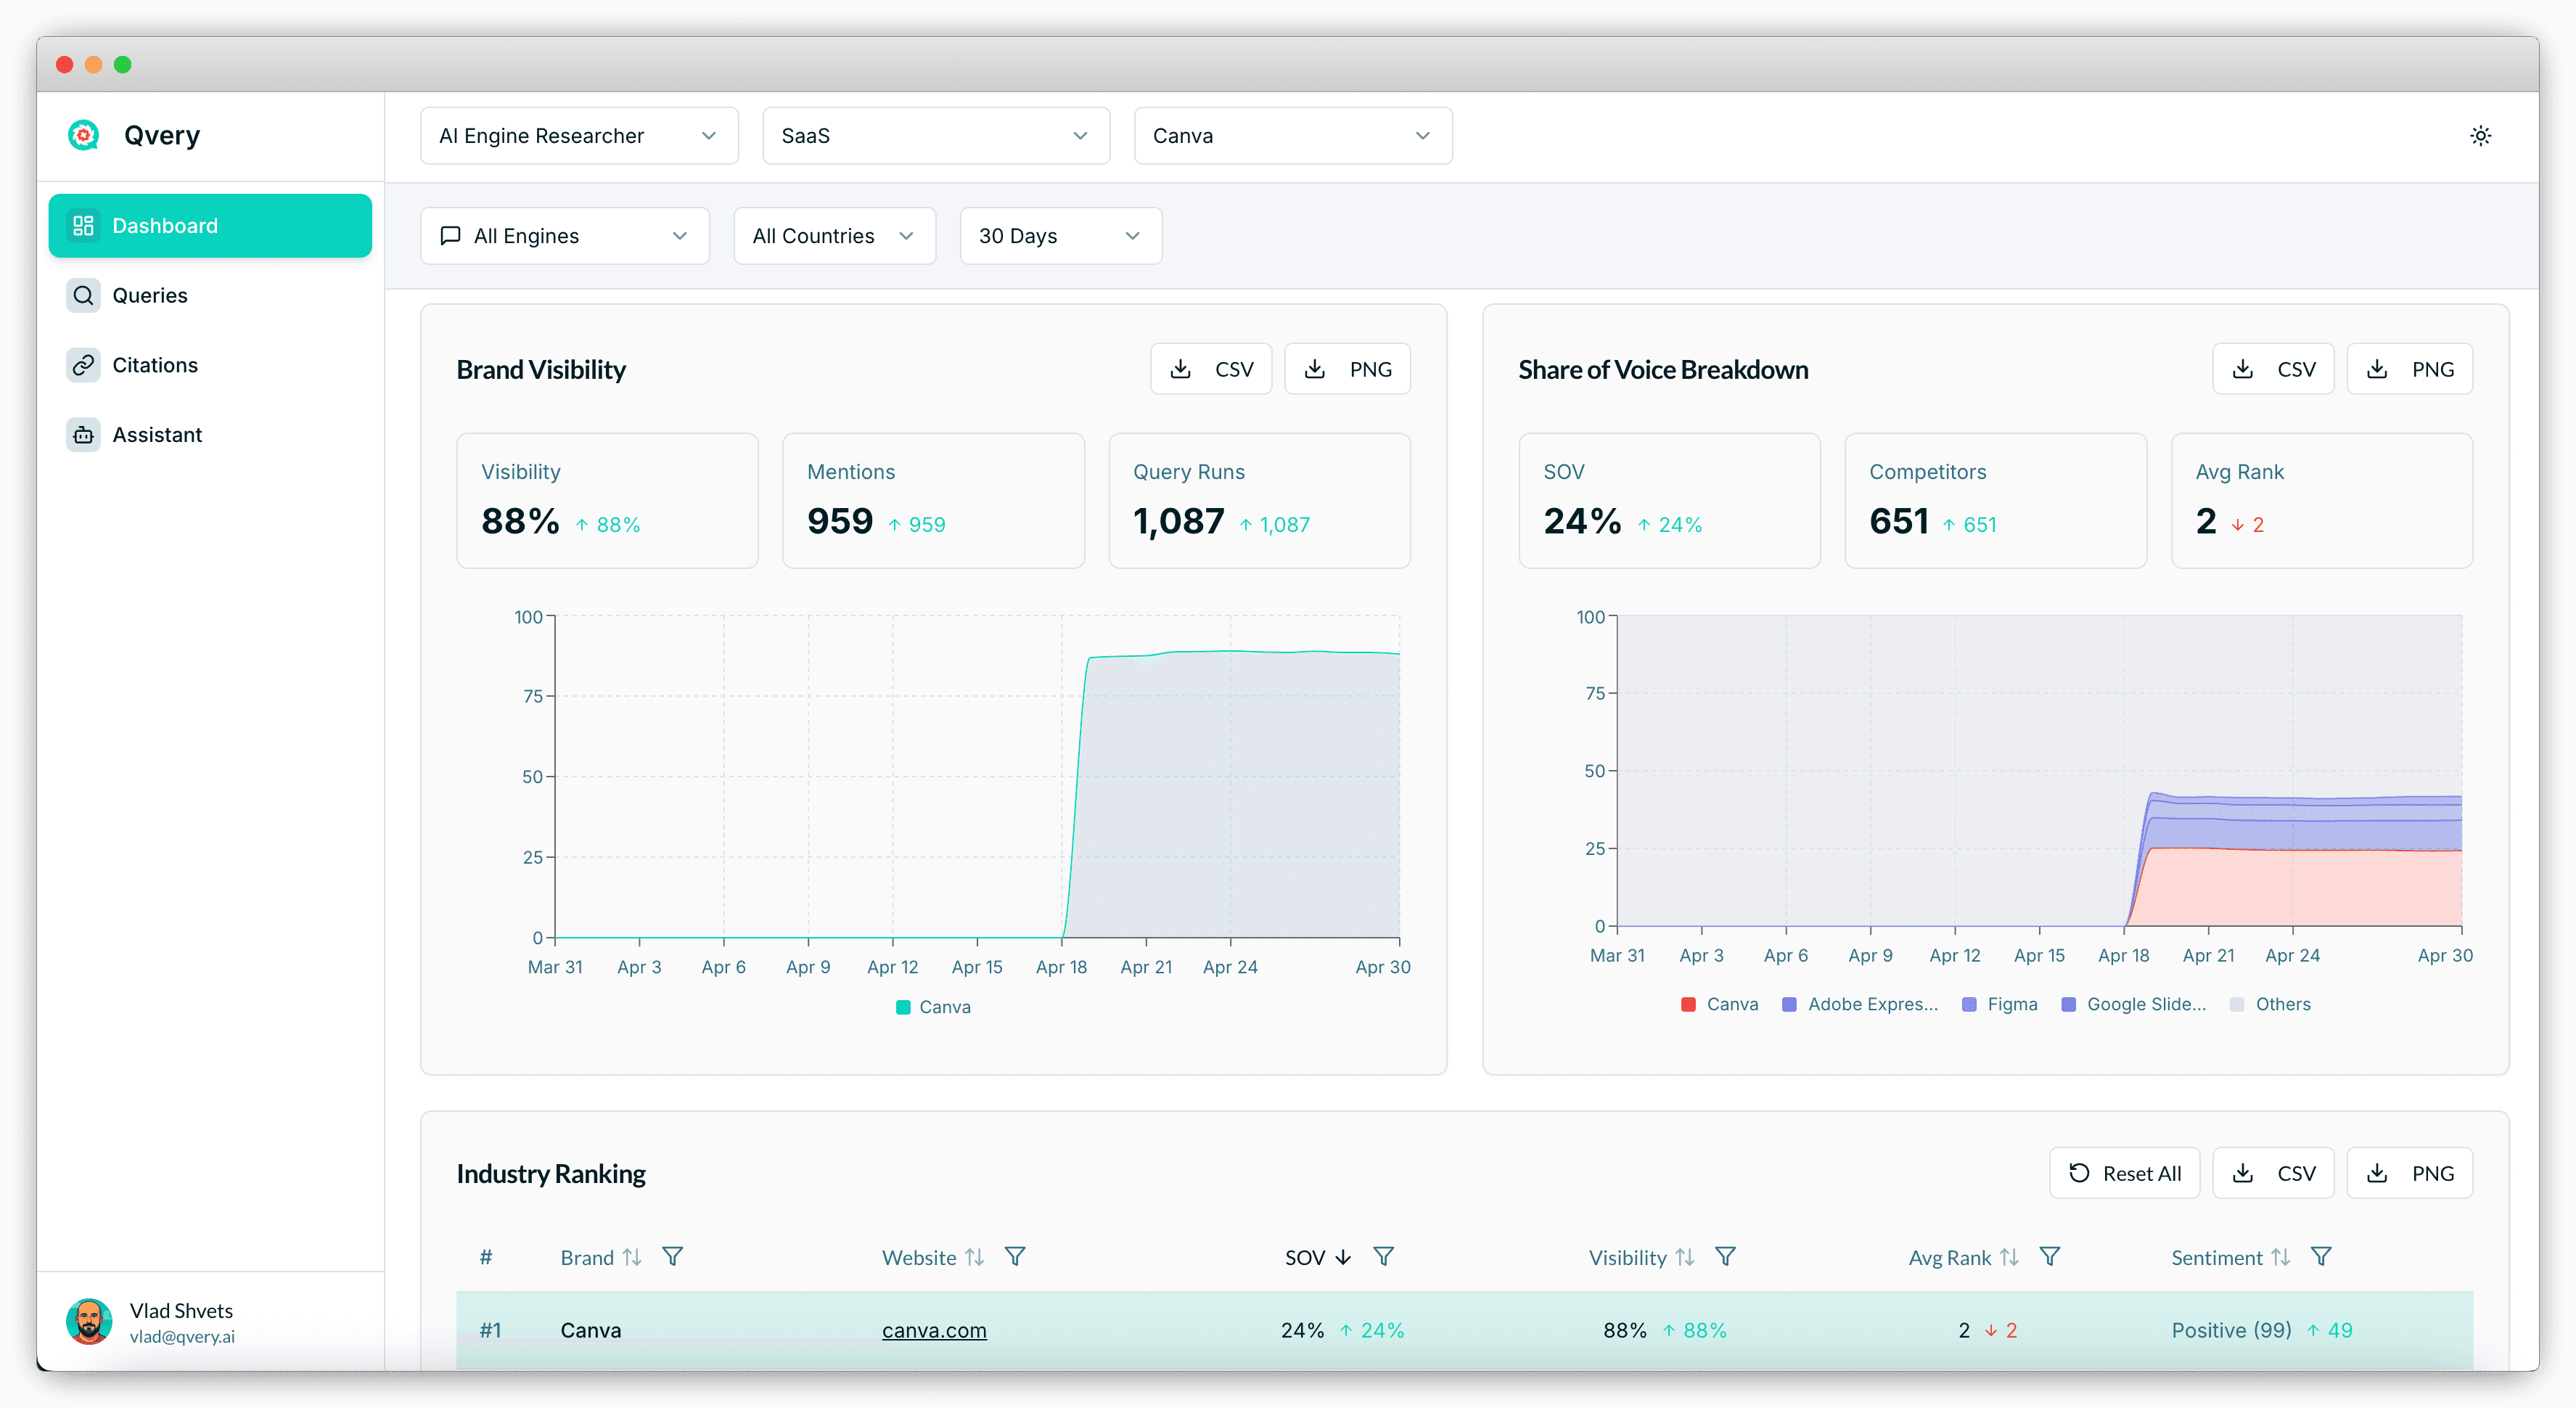
The Dashboard, Queries, and Citations modules fill up in real time. You can ask Qvery Assistant questions about your data the moment it lands. Mark the date — your AI engine visibility is now being measured.
Start your free trial and check the rest of our webinar series. If you hit any snags or have questions about your data, message us through the in-app Intercom or email me at vlad@qvery.ai.
